
Spring-Boot REST Docs 적용기 (with. Gradle, Maven)
실행 환경
- Spring Boot
2.7.1 - Gradle
7.4.1 - Maven
3.8.5
빌드 시스템 설정
Gradle
plugins {
    id 'org.springframework.boot' version '2.7.1'
    id 'io.spring.dependency-management' version '1.0.11.RELEASE'
    id 'java'
    id 'org.asciidoctor.jvm.convert' version '3.3.2' // (1)
}

group = 'com.example'
version = '0.0.1-SNAPSHOT'
sourceCompatibility = '11'

configurations {
    compileOnly {
        extendsFrom annotationProcessor
    }
}

repositories {
    mavenCentral()
}

ext {
    snippetsDir = file('build/generated-snippets') // (2)
}

test {
    outputs.dir snippetsDir // (3)
    useJUnitPlatform()
}

asciidoctor {
    inputs.dir snippetsDir // (4)
    dependsOn test // (5)
}

dependencies {
    implementation 'org.springframework.boot:spring-boot-starter-data-jpa'
    implementation 'org.springframework.boot:spring-boot-starter-web'
    compileOnly 'org.projectlombok:lombok'
    runtimeOnly 'com.h2database:h2'
    annotationProcessor 'org.projectlombok:lombok'
    testImplementation 'org.springframework.boot:spring-boot-starter-test'
    testImplementation 'org.springframework.restdocs:spring-restdocs-mockmvc' // (6)
}- (1) 해당 플러그인은 .adoc 파일 변환과 build/ 디렉토리에 복사해주는 플러그인입니다. Gradle 버전 7 이상부터 'org.asciidoctor.jvm.convert' 로 변경되었다고 합니다.
- (2) Snippets 생성위치를 전역 변수로 할당합니다.
- (3) test의 출력 디렉토리를 Snippets 디렉토리로 설정합니다.
- (4) 입력 디렉토리를 Snippets 디렉토리로 설정합니다.
- (5) 해당 작업은 test → asciidoctor 순으로 실행됩니다.
- (6) test-scope mockMvc에 의존성을 추가합니다.
Maven
<!-- (1) -->
<dependency>
    <groupId>org.springframework.restdocs</groupId>
    <artifactId>spring-restdocs-mockmvc</artifactId>
    <scope>test</scope>
</dependency>

<!-- REST DOCS -->
<!-- asciidoctor 플러그인 추가 -->
<!-- (2) -->
<build>
    <plugins>
            <plugin>
                <groupId>org.asciidoctor</groupId>
                <artifactId>asciidoctor-maven-plugin</artifactId>
                <version>2.2.2</version>
                <executions>
                    <execution>
                        <id>generate-docs</id>
                        <!-- (3) -->
                        <phase>prepare-package</phase>
                        <goals>
                            <goal>process-asciidoc</goal>
                        </goals>
                        <configuration>
                            <backend>html</backend>
                            <doctype>book</doctype>
                        </configuration>
                    </execution>
                </executions>
                <dependencies>
                    <!-- (4) -->
                    <dependency>
                        <groupId>org.springframework.restdocs</groupId>
                        <artifactId>spring-restdocs-asciidoctor</artifactId>
                        <version>2.0.4.RELEASE</version>
                    </dependency>
                </dependencies>
            </plugin>
        </plugins>
</build>- (1) Test scope RestDocs MockMvc를 추가합니다.
- (2) asciidoctor 플러그인을 추가합니다.
- (3) prepare-package 옵션은 패키지내에 API 문서를 포함할 수 있게 합니다.
- (4) asciidoctor의 의존성으로 spring-restdocs-asciidoctor 추가 .adoc 파일이 target/generated-snippets 아래에 생성된 Snippets 을 가리키는 설정이 추가된다.
문서 패키징 (Packaging the Documentation)
Maven
<plugin>
    <groupId>org.asciidoctor</groupId>
    <artifactId>asciidoctor-maven-plugin</artifactId>
    <!-- 생략.. -->
</plugin>
<!-- (1) -->
<plugin>
    <groupId>org.apache.maven.plugins</groupId>
    <artifactId>maven-resources-plugin</artifactId>
    <version>3.2.0</version>
    <executions>
        <execution>
            <id>copy-resources</id>
            <phase>prepare-package</phase>
            <goals>
                <goal>copy-resources</goal>
            </goals>
            <configuration>
                <!-- (2) -->
                <outputDirectory>
                    ${project.build.outputDirectory}/static/docs
                </outputDirectory>
                <resources>
                    <resource>
                        <directory>
                            ${project.build.directory}/generated-docs
                        </directory>
                    </resource>
                </resources>
            </configuration>
        </execution>
    </executions>
</plugin>- (1) 문서가 패키지로 복사되기 전에 생성되야 하므로 위에 Asciidoctor 플러그인 뒤에 선언합니다.
- (2) generated-docs/index.html을 static/docs 에 복사
Gradle
bootJar {
    dependsOn asciidoctor // (1)
    copy { // (2)
        from "${asciidoctor.outputDir}"
        into 'src/main/resources/static/docs'
    }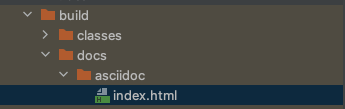
}- (1) 해당 작업은 asciidoctor → bootJar 순으로 실행됩니다.
- (2) asciidoctor가 생성해준 build/docs/asciidoc에 있는 HTML 파일이 src/main/resources/static/docs 디렉토리에 생성됩니다. static 아래에 있는 파일들은 톰캣이 자동으로 호스팅을 해주기 때문에 http://localhost:8080/docs/index.html 로 접근할 수 있습니다.
TestSupport 클래스 생성
기본 공통 설정들을 따로 클래스에 빼도록 하겠습니다.
여기서 설정은 디렉토리가 클래스명/메소드명 으로 형성이 됩니다.
@ExtendWith(RestDocumentationExtension.class) 를 적용합니다.
• RestDocumentationExtension 은 Maven 의 경우 “target/generated-snippets” Gradle 의 경우 “build/generated-snippets” 를 자동으로 출력 디렉토리로 설정되어있다.
import static org.springframework.restdocs.mockmvc.MockMvcRestDocumentation.document;
import static org.springframework.restdocs.mockmvc.MockMvcRestDocumentation.documentationConfiguration;
import static org.springframework.restdocs.operation.preprocess.Preprocessors.*;
import static org.springframework.test.web.servlet.result.MockMvcResultHandlers.print;

@ExtendWith(RestDocumentationExtension.class)
public class TestSupport {

    protected MockMvc mockMvc;

    @BeforeEach
    void setUp(WebApplicationContext context,
               RestDocumentationContextProvider provider) {

        this.mockMvc = MockMvcBuilders.webAppContextSetup(context)
                .apply(MockMvcRestDocumentation.documentationConfiguration(provider))
                .alwaysDo(print())
                .alwaysDo(document("{class-name}/{method-name}",
                                preprocessRequest(prettyPrint()),
                                preprocessResponse(prettyPrint())
                        )
                )
                .build();
    }
}
위 설정 어노테이션으로 한방에 설정 적용하기!
    @AutoConfigureMockMvc    // --> webAppContextSetup(webApplicationContext)
    @AutoConfigureRestDocs   // --> apply(MockMvcRestDocumentation.documentationConfigration(restDocumentationContextpProvider)
REFERENCE
get, post 패키지 변경
기존 사용중이던 MockMvcRequestBuilders에서 RestDocumentationRequestBuilders로 변경
//import static org.springframework.test.web.servlet.request.MockMvcRequestBuilders.get;
//import static org.springframework.test.web.servlet.request.MockMvcRequestBuilders.post;

/*
    기존 MockMvcRequestBuilders 패키지에서 RestDocumentationRequestBuilders로 변경!
*/

import static org.springframework.restdocs.mockmvc.RestDocumentationRequestBuilders.get;
import static org.springframework.restdocs.mockmvc.RestDocumentationRequestBuilders.post;
자 이제 모든 준비가 끝났습니다. 테스트를 작성하여 문서를 만들어 보겠습니다.
테스트 작성
REST Docs를 생성하기 위해서는 굳이 @SpringBootTest 를 진행할 이유가 없습니다.
시간도 오래 걸리고 모든 빈들이 올라가기 때문에 신경써줘야 할 부분들이 많기 때문입니다.
그래서 대부분 WebMvcTest 필요한 의존성들을 Mocking 하여 테스트를 진행합니다.
아래는 controller 테스트 코드입니다.
@WebMvcTest(controller = UserTodoListApiController.class)
public class UserAccountApiDocsTest extends RestDocumentSupport {

    @MockBean
    private AccountService accountService;

    @Test
    @WithMockUser
    void retrieve_My_Account() throws Exception {
        // given
        AccountDto accountDto = AccountDto.builder()
                .id(5L)
                .username("test")
                .password("pass")
                .email("test@email.com")
                .nickname("nickname")
                .roles("USER")
                .todoList(null)
                .build();
        given(accountService.findMyAccount(anyString())).willReturn(accountDto);

        // when & then
        mockMvc.perform(get("/user/accounts/{username}", "john1234")
                        .header("Authorization", "testToken"))
                .andDo(print())
                .andDo(document("{class-name}/{method-name}",
                                requestHeaders( // (1)
                                        headerWithName("Authorization").description("JWT 토큰 값")
                                ),
                                pathParameters( // (2)
                                        parameterWithName("username").description("사용자 아이디")
                                ),
                                responseFields( // (3)
                                        fieldWithPath("id").description("idx"),
                                        fieldWithPath("username").description("아이디"),
                                        fieldWithPath("password").description("패스워드"),
                                        fieldWithPath("nickname").description("닉네임"),
                                        fieldWithPath("email").description("이메일"),
                                        fieldWithPath("roles").description("권한"),
                                        fieldWithPath("todoList").ignored()
                                )
                        )
                )
                .andExpect(status().isOk())
        ;
    }
문서화를 하기 위해서는 요청과 응답에 포함된 헤더, 바디 등등에 포함된 값들을 명세해줘야 합니다.
- (1) Request Header에 들어가는 값을 명세합니다.
- header값이기 때문에
headerWithName으로 명세합니다.
- header값이기 때문에
- (2) Path Parameter에 들어가는 값을 명세합니다.
- Parameter이기 때문에
parameterWithName으로 명세합니다.
- Parameter이기 때문에
- (3) ResponseFields, 즉 ResponseBody에 있는 필드값에 대한 명세합니다.
- 필드는
fieldWithPath로 지정할 수 있고, 설명 또는 타입 또는 optional 여부도 지정해줄 수 있습니다.
- 필드는
자세한 사항은 공식문서를 확인하시기 바랍니다.
빌드 및 Snippet 확인
테스트가 통과가 되면, Maven 의 경우 target/generated-snippets Gradle 의 경우 build/generated-snippets 아래에 snippets이 생기게 됩니다.
기본적으로 생성되는 snippets은 다음과 같습니다.
<output-directory>/index/curl-request.adoc<output-directory>/index/http-request.adoc<output-directory>/index/http-response.adoc<output-directory>/index/httpie-request.adoc<output-directory>/index/request-body.adoc<output-directory>/index/response-body.adoc
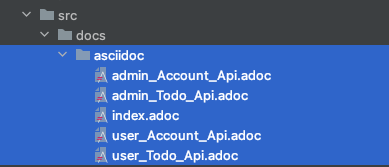
만들어진 Snippet 들을 연결해줄 사용자 정의 .adoc 파일을 src/docs/asciidoc 경로에 만들고 작성합니다. (Asciidoctor User Manual 참고)
.adoc 생성
== Feature 1 REST API
:doctype: book
:icons: font
:source-highlighter: highlightjs
:toc: left
:toclevels: 4
:sectlinks:

=== API 기능명
==== Request 요청
include::{snippets}/className/methodName/http-request.adoc[]
include::{snippets}/className/methodName/request-headers.adoc[]
include::{snippets}/className/methodName/path-parameters.adoc[]
include::{snippets}/className/methodName/request-body.adoc[]
include::{snippets}/className/methodName/request-fields.adoc[]

==== Response 응답
include::{snippets}/className/methodName/http-response.adoc[]
include::{snippets}/className/methodName/response-body.adoc[]
include::{snippets}/className/methodName/response-fields.adoc[]toc:left: Table Of Content를 사용하고 위치를 왼쪽으로 지정합니다.toclevels: toc의 깊이를 설정합니다. h1~h4까지 표시합니다.
이제 API 별로 .adoc을 생성했다면, 최종 API 문서를 위해 index.adoc을 생성해줍니다.
index.adoc 생성
asciidoctor 플러그인은 index.adoc이라는 파일을 index.html으로 변환하여 jar 내부에 위치시켜줍니다.
= MyApp REST API
:doctype: book
:icons: font
:source-highlighter: highlightjs
:toc: left
:toclevels: 4
:sectlinks:

// (1)
include::{docdir}/Feature_1_Api.adoc[]

include::{docdir}/Feature_2_Api.adoc[]

include::{docdir}/Feature_3_Api.adoc[]- (1) 기능별로 생성해준
.adoc파일들을 적어줍니다.
문서 패키징
- 생성된
Snippets

src/docs/asciidoc생성된 .adoc 파일들
- Maven : clean → package 순으로 진행
- Gradle : clean → build 순으로 진행
include file not found.. 에러 발생..?
Task :asciidoctor
include file not found: /Users/iseunghan/workspaces/study/test-rest-docs-gradle/{snippets}/user-todo-list-api-controller-test/create_-todo/http-request.adoc …

index.adoc 상단에 아래 코드 추가!
ifndef::snippets[]
:snippets: ../../build/generated-snippets
endif::[]
Snippets의 경로를 찾지 못하는 것 같은데 static/docs/index.html 기준으로 Snippets의 상대경로를 지정해주는 것입니다.
성공!
정상적으로 생성된 index.html
이제 localhost:8080/docs/index.html 로 접근할 수 있습니다.

모든 코드는 Github에 있으니 참고하시길 바랍니다. 감사합니다
REFERENCES
- https://spring.io/guides/gs/testing-restdocs/
- https://docs.spring.io/spring-restdocs/docs/current/reference/html5/
- https://stackoverflow.com/questions/68539790/configuring-asciidoctor-when-using-spring-restdoc
- https://subji.github.io/posts/2021/01/06/springrestdocsexample
- https://tecoble.techcourse.co.kr/post/2020-08-18-spring-rest-docs/
- https://techblog.woowahan.com/2597/
- https://springboot.tistory.com/26